Page History
...
| Section | ||||||||||
|---|---|---|---|---|---|---|---|---|---|---|
|

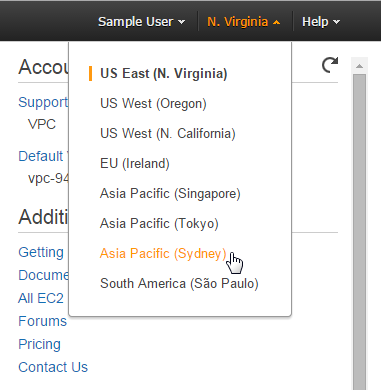
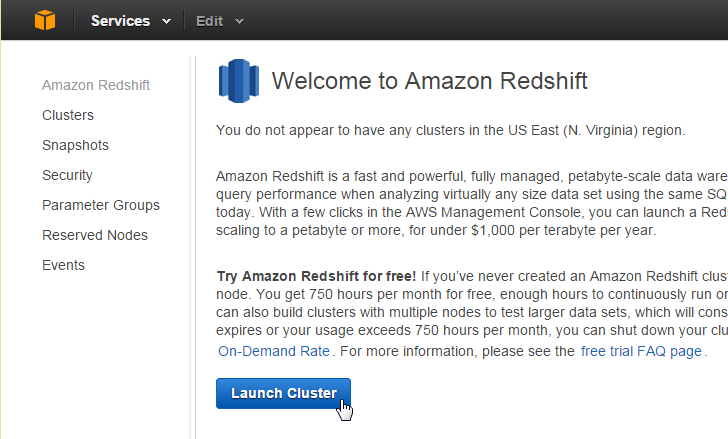
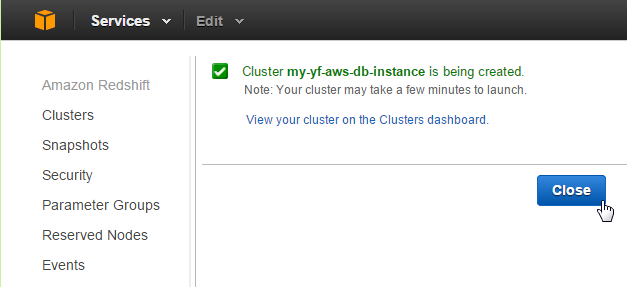
Create Cluster
| Section | ||||||||||
|---|---|---|---|---|---|---|---|---|---|---|
|
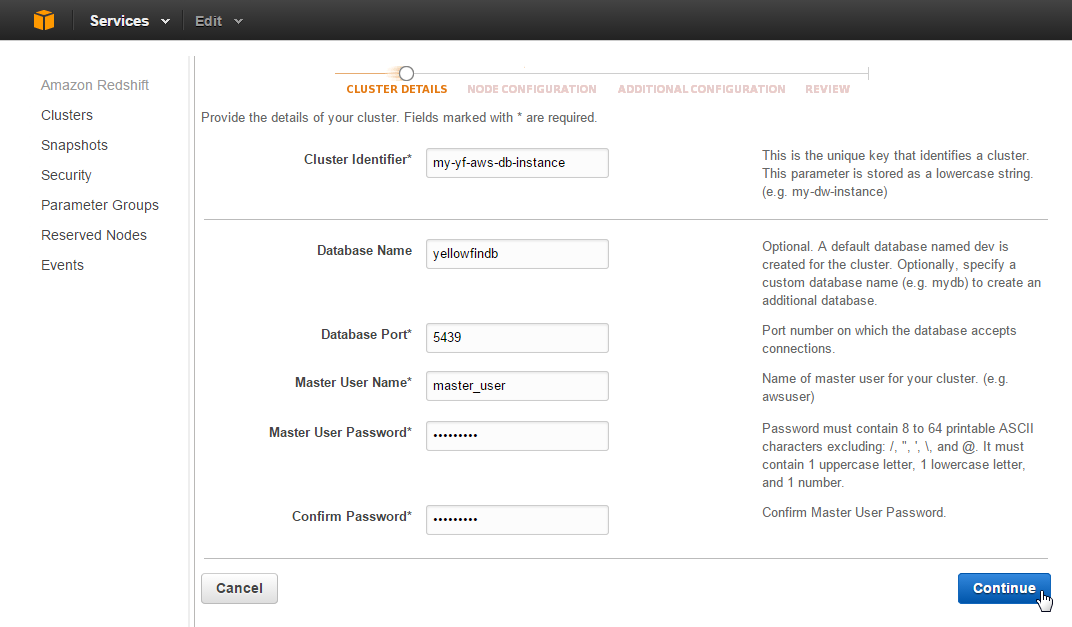
Cluster Details
| Section | ||||||||||
|---|---|---|---|---|---|---|---|---|---|---|
|
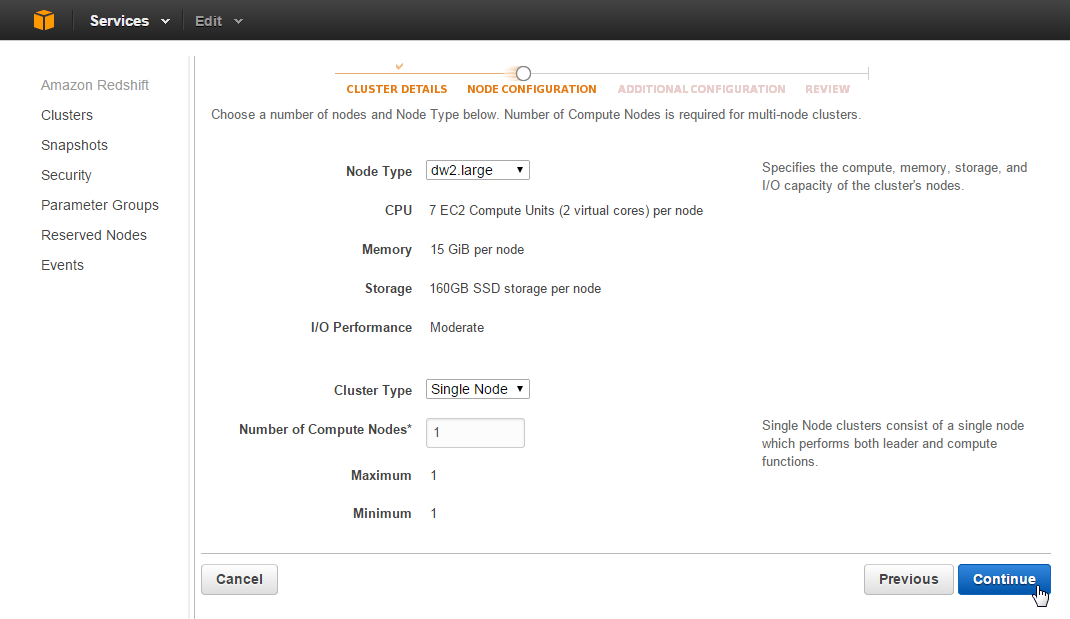
Node Configuration
| Section | ||||||||||
|---|---|---|---|---|---|---|---|---|---|---|
|
Additional Configuration
| Section | ||||||||||
|---|---|---|---|---|---|---|---|---|---|---|
|

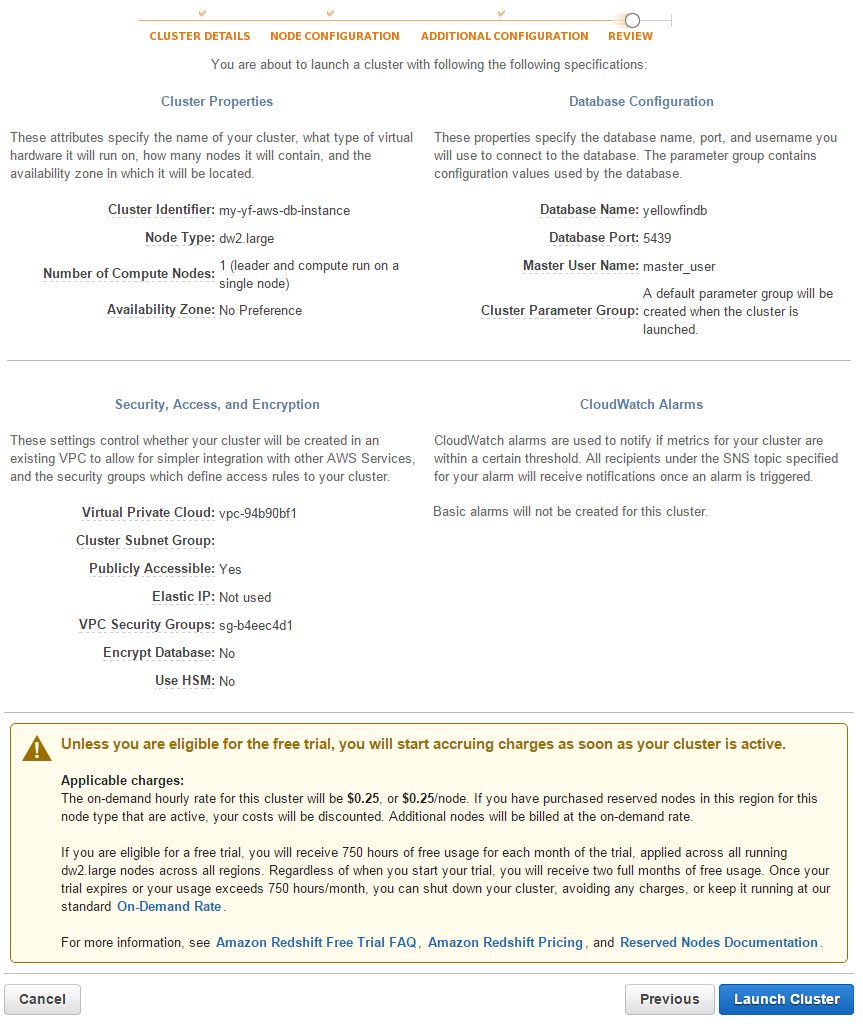
Review & Launch
| Section | ||||||||||
|---|---|---|---|---|---|---|---|---|---|---|
|
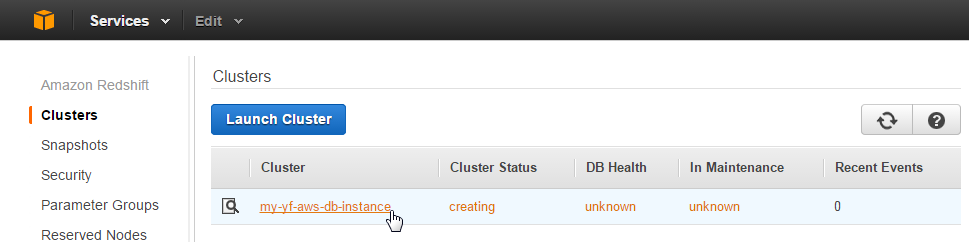
View Clusters
| Section | ||||||||||
|---|---|---|---|---|---|---|---|---|---|---|
|
Cluster Name
| Section | ||||||||||
|---|---|---|---|---|---|---|---|---|---|---|
|
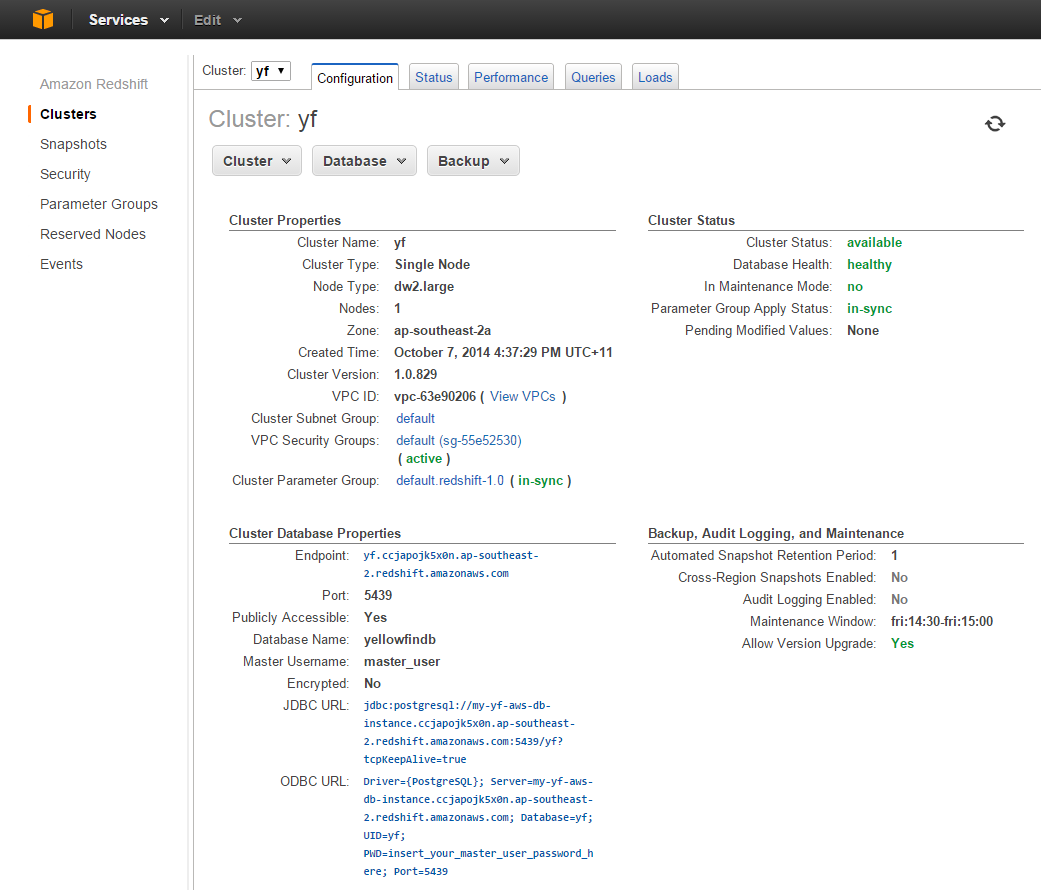
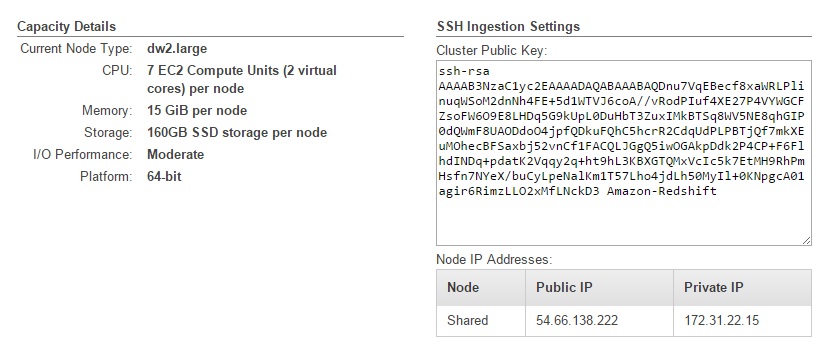
Cluster Details
| Section | ||||||||||
|---|---|---|---|---|---|---|---|---|---|---|
|
Yellowfin
| Styleclass | ||
|---|---|---|
| ||
...
| Section | ||||||||||
|---|---|---|---|---|---|---|---|---|---|---|
|
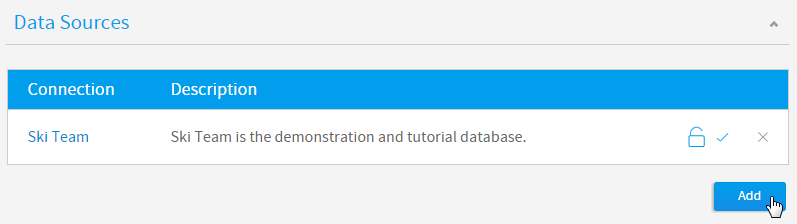
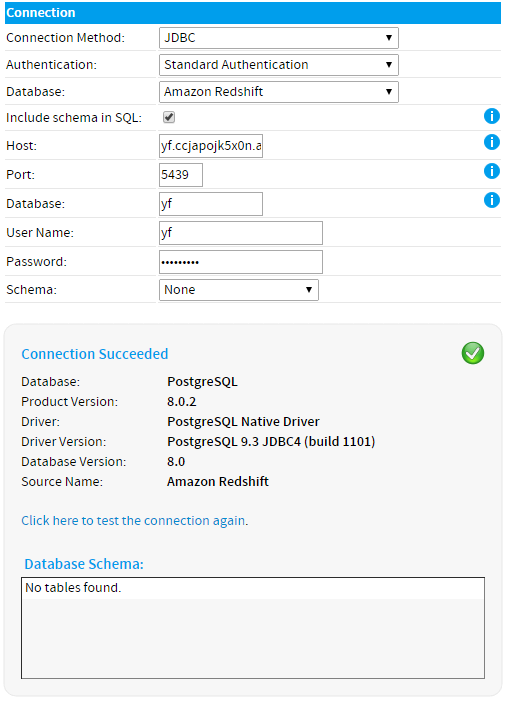
Data Source Details
...
| Section | ||||||||||
|---|---|---|---|---|---|---|---|---|---|---|
|
You are now ready to add data to your Cluster and build reports.
...